Offerwall Domain Setup Guide for OGAds
Written by Ben
Firstly, buy your domain from your favorite registrar! We recommend InternetBS or Namecheap.
Sign up to cloudflare.com.
Add your domain to Cloudflare (you use the free plan).
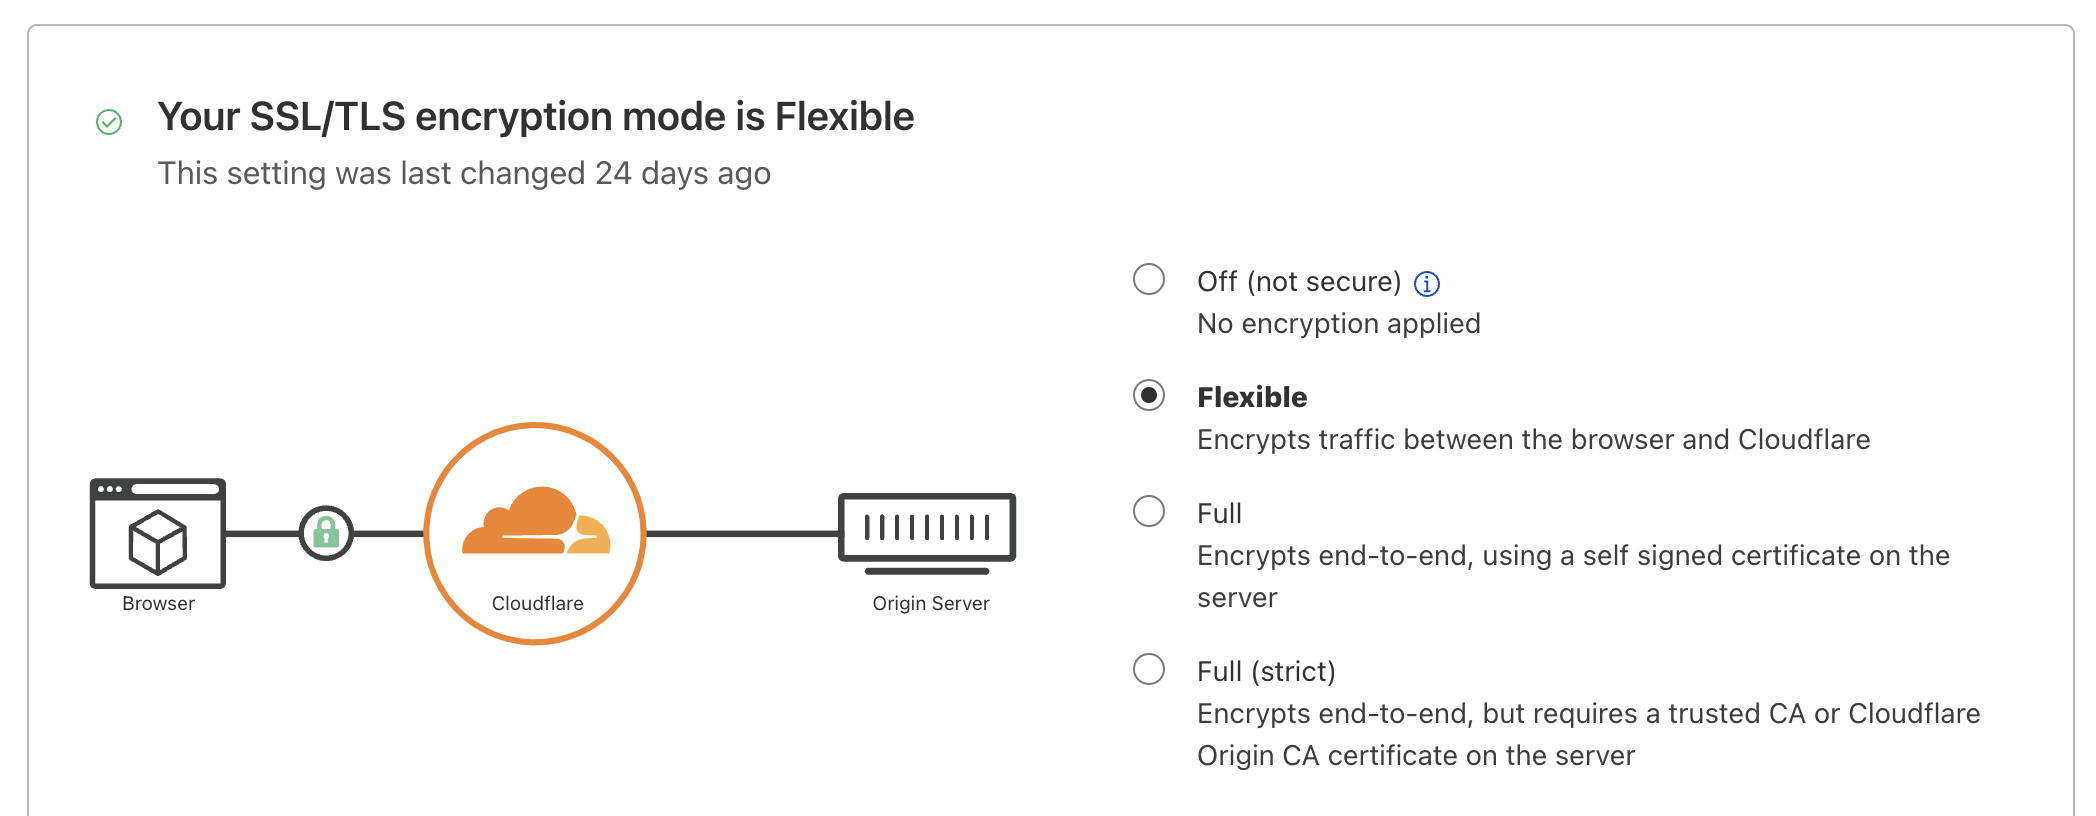
For the SSL Settings you must pick Flexible.
Complete all steps on Cloudflare, including changing your name servers on your registrar until you have added your site successfully and you see it has been accepted.

Click on the site and go to the DNS area, you can delete all the records that are in the box already if you are on a brand new domain.
Under the DNS section add a CNAME record with the following settings:
Name: @
Target: ogadswall.com
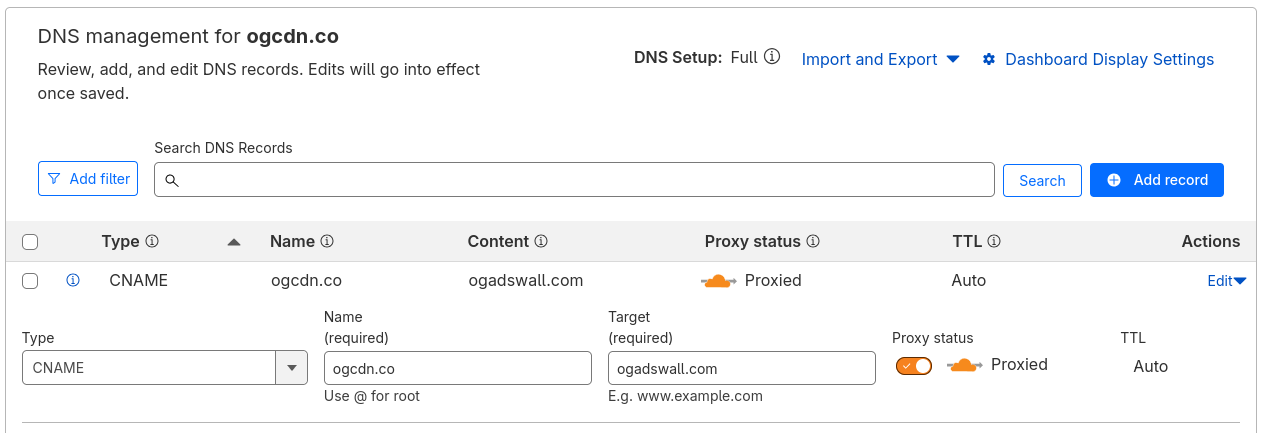
Ensure your page looks just like the screenshot above.
Congrats, you setup Cloudflare for OGAds Offerwall! Now please add it to the OG Dashboard.
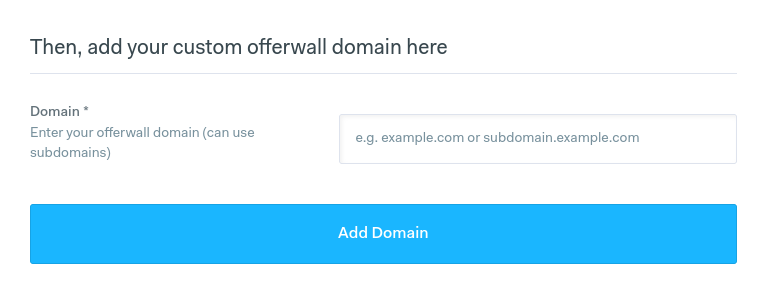
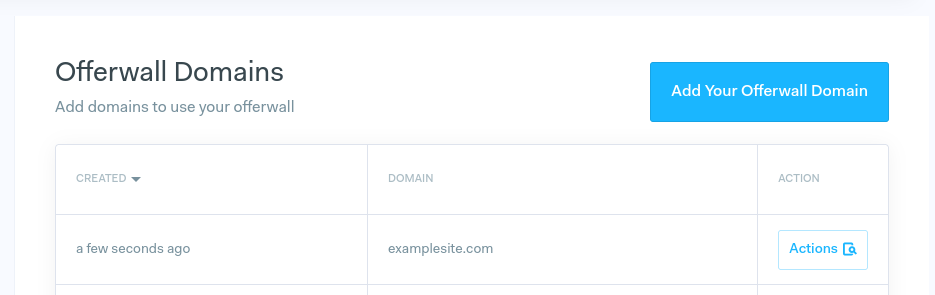
Login to the OGAds dash and go to Tools → Offerwall → Domains.
Click the "Add Your Offerwall Domain" button, enter your domain and then click "Add Domain".
Congratulations! Your offerwall should now be working under the registered domain!
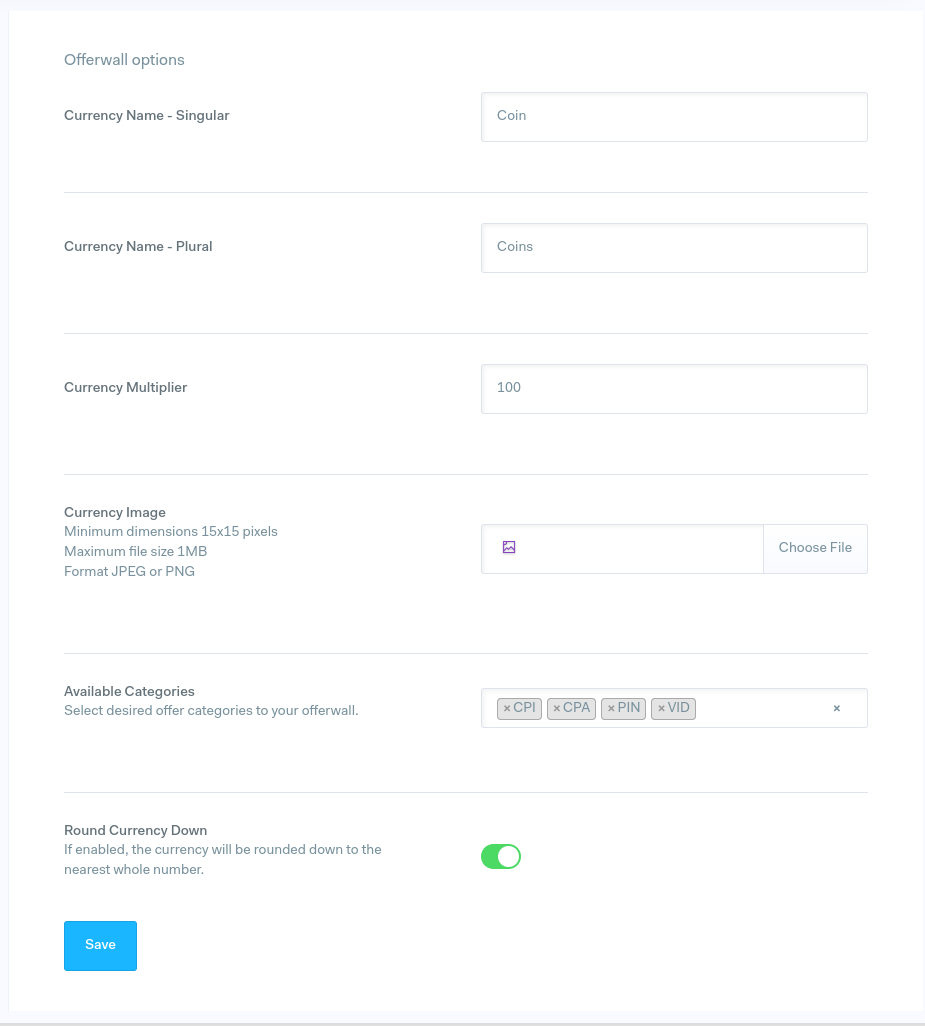
Now you can customize your Offerwall options at Tools → Offerwall → Options.
When redirecting a user to your offerwall or using it in an iframe, make sure to set the aff_sub4 query parameter to track the user with postbacks.
E.g. https://exampledomain.com?aff_sub4=user@email.com
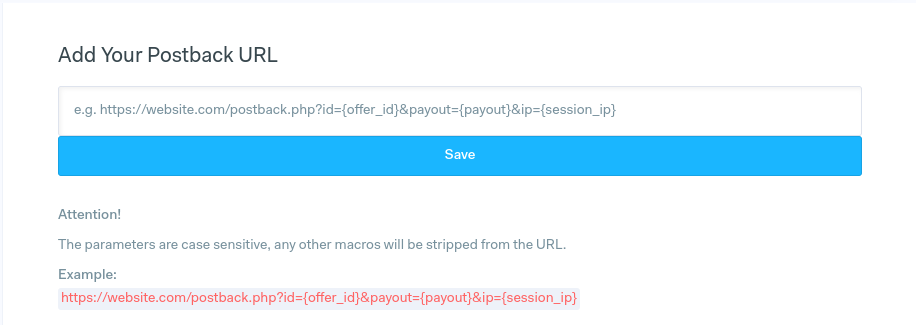
Postbacks will be sent to your configured postback URL, make sure to set it in Tools → Postback URL.